 A huge theater screen is a vital part of any man cave. Whether you are playing video games or watching your favorite team, a theater experience can make all the difference.
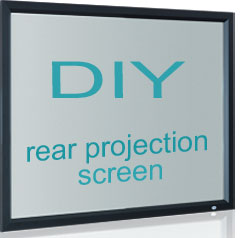
Traditional projection systems are a good option that can provide you with a massive screen size. However, these systems aren’t very versatile. If you’re looking to get the most out of your screen, a rear project screen is the way to go.
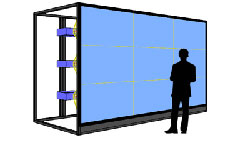
In traditional projection systems, the projector is mounted on the ceiling. Rear projection systems work from behind the screen. The projector throws the image onto the screen from behind, eliminating the chance of any obstructions.
 No Shadow
 No Shadow
A rear projection screen allows you to stand directly in front of it without casting a shadow. This makes the screen incredibly versatile.
Not only will you be able to move around the theater room without worry, but you’ll also be able to play motion sensor games on the big screen for an immersive experience.
While it may seem like a rear projection screen would cost a fortune, you can easily create one on your own. This allows you to create a custom setup to your preferences while saving a load of money in the process.
[divider style=”dashed” top=”20″ bottom=”20″]
What You’ll Need
The components of a rear projection screen are fairly easy to find. With the rights tools and equipment, the screen can be made in no time. All you will need is:
[one_half]
[checklist]
- Four 4×4 studs
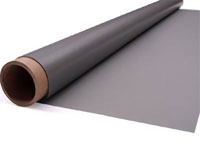
- Rear projection screen material
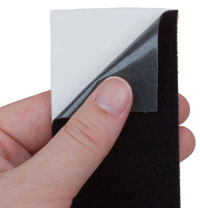
- Staple gun
- Black tape
[/checklist]
[/one_half]
[one_half_last]
[checklist]
- Scissors
- Screwdriver
- About 30 screws
[/checklist]
[/one_half_last]
The size of the 4×4 studs will be entirely dependent on the size and screen ratio you desire. You will need to plan ahead and choose a size that will fit your space. There are many resources to figure out the aspect ratio of the screen based on the measurements. You can usually get the wood precut at the store when you purchase it to make things even easier. The projection screen material should also be chosen based on these measurements.
[divider style=”normal” top=”20″ bottom=”20″]
Building Your Screen
 Now that you’ve gathered your materials, it’s time to get building. The process of building the screen is fairly simple. The main goal is to make a frame that will support the fabric.
If your wood was precut and measured, you can move on to assembly.
[divider]
Step 1. Piecing together the frame
To assemble the frame, simply place a longer stud on the floor. Make sure to work on a flat surface to ensure that the frame is as straight as possible. Once it is on a level floor, lay one of the shorter studs perpendicular to the longer stud.
 The end of the shorter stud should be placed on the end of the longer stud. Essentially, you are creating a butt joint with the two pieces of wood creating a right angle. Make sure that the side of the shorter stud is flush with the end of the longer stud.
You can repeat the process to create another right angle on the other side of the longer stud. After the two vertical studs are in place, you can finish off with the final stud on top. The studs should be placed in a perfect rectangle on the floor, ready for screws.
Step 2. Screw it together
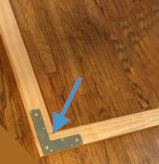 If the studs were cut perfectly, the studs should easily create a right angle. However, a faulty cut will only make the frame more difficult to work with. If that is the case, you can use a metal “L” bracket. The bracket will make it easier to create a right angle without all of the guess work.
Once you have the right angles figured out, you can begin screwing the studs together. Because the assembly is laying on the floor, it will be easy to screw the frame together at every corner. Multiple screws should be used at every joint to ensure that the frame stays together. They will also increase its durability, ensuring that the final screen isn’t flimsy.
[divider style=”normal” top=”20″ bottom=”20″]
Step 3. Attaching the projection fabric
To attach the fabric, simply spread it out on a clean surface. Wrinkles should be smoothed out to ensure that the final product is perfect. Then, place the newly-built frame directly on top of it.
 The staple gun will be used to attach the fabric. A help of a friend may also be needed, as the fabric can be a bit stubborn. To attach it, simply start at the bottom edge of the frame. At the center of the bottom edge, pull the fabric around the wood. While this is being done, it’s good to have a friend holding the other side. Staple the fabric in place once you’ve ensured that it is smooth.
After the center is finished, simply repeat the process as you move towards the corner. Once you’ve reached the corner, return to the center and go towards the other corner. It’s important that you complete the rest of the frame by evening out the tension on the fabric. This means moving to the opposite edge next. If you move to one of the sides, the fabric will become uneven. As with the first edge, start at the center.
When the top and bottom are finished, you can move onto the sides. Repeat the stapling process, keeping the fabric tight and smooth. To staple the corners, simply fold any excess fabric to one side. It should be folded over into a flat bundle and stapled down. Take extra care on the corners, as they can affect the overall smoothness of the screen.
[divider style=”normal” top=”20″ bottom=”20″]
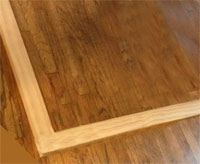
Step 4. Cleaning it up and making a border
 Stand up the covered frame and inspect your work. Look for any unevenness on the fabric and fix any mistakes by pulling on the fabric and adding staples. You can also use some scissors to cut off any excess fabric. If you are happy with your work, you can move on to creating the border.
Use the black tape to create an even border around the perimeter of the frame. Make sure to cover up the staples and wood. The black tape will make the screen look cleaner and less DIY. It will also help make the picture look better by increasing contrast on the edges.
[divider style=”double” top=”20″ bottom=”20″]
How to Position the Projector
The screen should be placed vertically in the theater room. These screens are usually attached to the ceiling, with mounting hardware installed on the top edge of the screen. There should be ample room behind the screen for the projector.
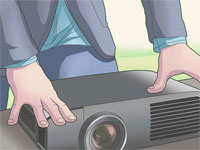 Placing the projector is an important part of the process. Its position is crucial, as it can have an effect on the overall picture. Projectors should never be placed directly in the middle of the screen. Not only will it cause the picture to be substandard, but there will be a bright spot in the middle of the screen. The edges of the picture will be dark and blurry. The bright spot may also cause eye irritation.
A good position for the projector is at the top or bottom of the screen angled towards the center. To minimize distortion, you can alter the settings on the projector or find the best viewing angle. An off-axis position in relation to the viewers is ideal. You can easily find the best angle by drawing a line from the best viewing position through the center of the screen. If you continue this line past the screen, you’ll find the best off-axis position for the projector to get a perfect picture.
Once you have the perfect position, you can turn on the projector, sit back, and enjoy your work. These screens are a great addition to any entertainment space.
 Thanks to the lack of shadows and obstructions, you can use the screen for any purpose. So invite some friends over, watch a game, then have a blast playing some fun video games on your large rear projection screen.
![]()