Shaving with a safety razor is the 2nd most efficient way to get a perfect close shave. The only thing better is a wet shave with a straight razor. However, not everyone has the desire or willingness to overcome the learning curve of how to maintain and use a straight razor. That being said, safety razors are a nostalgic and effective way to get a close shave.
For those of you that want to get the most out of your safety razor routine, we have put together this infographic on everything you need to know about safety razors and and how to use them effectively.
Embed this infographic on your site:
[divider]
Below you can find a more detailed, written version of the infographic:
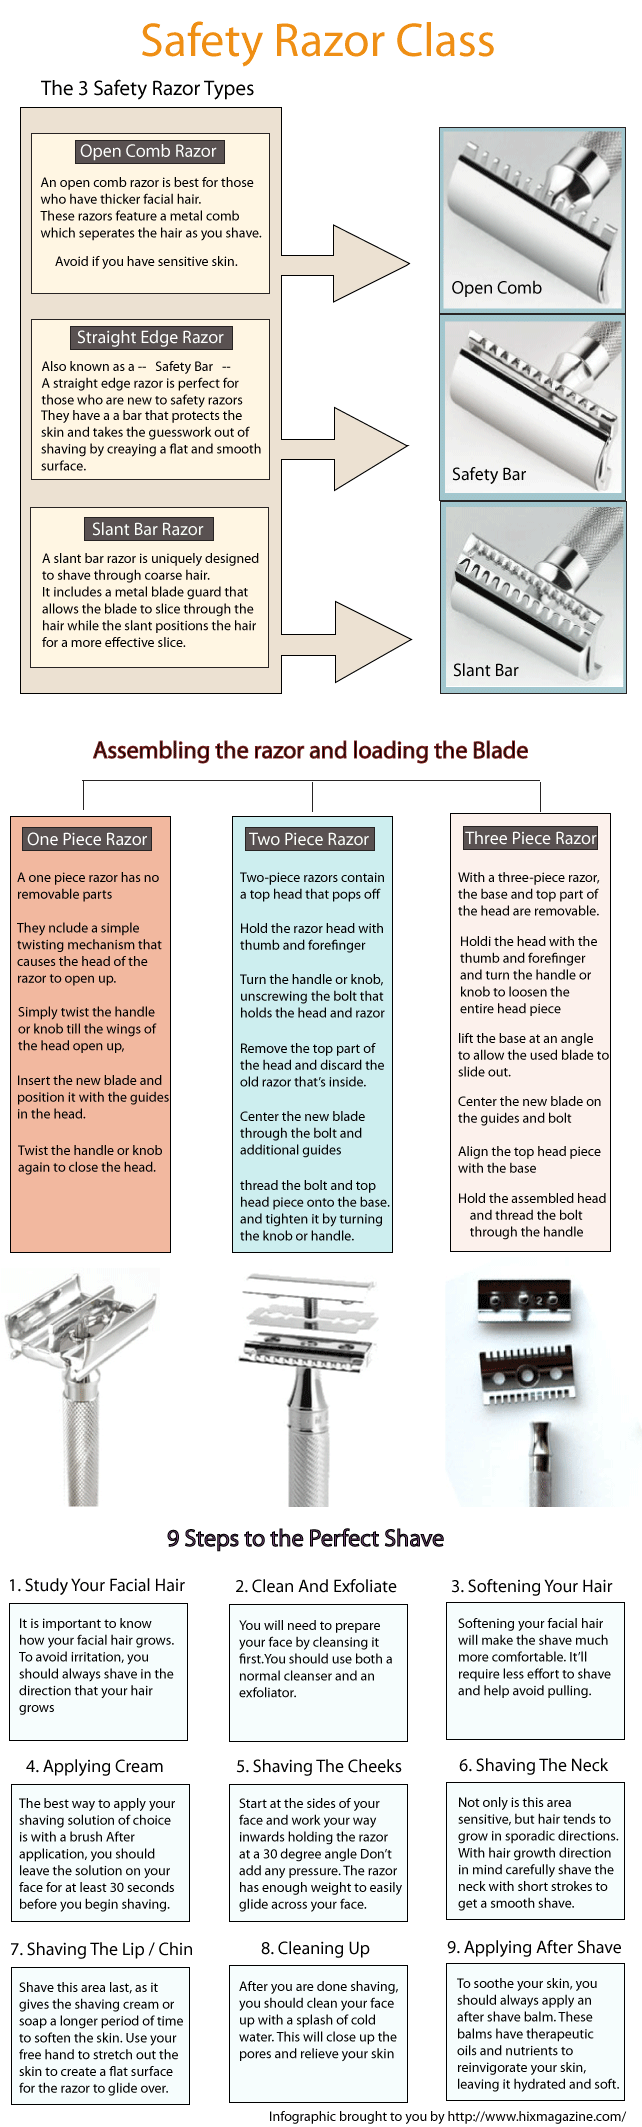
Types of Safety Razors
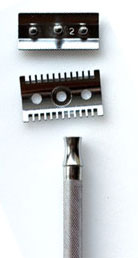
Open Comb
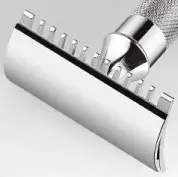 An open comb razor is best for those who have thicker facial hair. It is often used around the mustache and side burn area.These razors feature a metal comb that separates the hair as you shave.
Guys with thicker hair can benefit from an open comb razor because it effectively partitions hair for a clean cut. Instead of experiencing pulls and nicks, an open comb razor will provide a smooth shave.
It is a tough razor designed for tough hair. If you have sensitive skin, you may find that an open comb razor is too harsh for your skin
Straight Edge
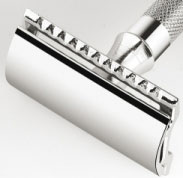 Also known as a — safety bar — a straight edge razor is perfect for guys who are new to safety razors. They have a bar that protects the skin.
The bar also helps to keep the skin taut. It takes the guesswork out of shaving by creating a flat and smooth surface.You can easily glide a straight edge razor through the contours of your face, as the razor makes your skin taut all on its own.
Because of its ease of use, it is the most popular type of safety razor available.
Slant Bar
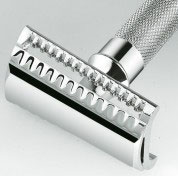 A slant bar razor is uniquely designed to shave through coarse hair. It includes a metal blade guard that allows the blade to slice through the hair. The slant positions the hair for a more effective slice.
This type of razor is not meant for beginners, but rather seasoned shavers. That being said, shavers can use this razor like normal safety razors. There’s no special way to use it. All of the work is done by the slanted guard.
[divider]
Assembling A Safety Razor
Loading A One-Piece Razor
 One-piece razors are often called butterfly razors. Instead of removable parts, these razors include a simple twisting mechanism that causes the head of the razor to open up, like a butterfly.
To load a blade into these razors, you must first remove the old blade by holding the entire razor upside-down. Simply twisting the handle or knob will cause the wings of the head to open up, dropping the old blade.
After the used blade is removed, you can turn the razor over. Inserting the new blade is as simple as positioning it with the guides in the head. With a twist of the knob, the head will close, making the razor fully assembled and ready.
[divider]
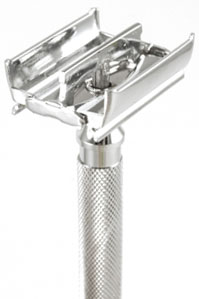
Loading A Two-Piece Razor
 Two-piece razors contain a top head that pops off. To remove the old blade, simply hold the razor head with your thumb and forefinger. You can then turn the handle or knob, unscrewing the bolt that holds the head and razor.
The top part of the head can then be removed to discard the old razor. The new blade must then be centered through the bolt and additional guides.
Once it is in place, you can then thread the bolt and top head piece onto the base. It should then be tightened by turning the knob or handle.
[divider]
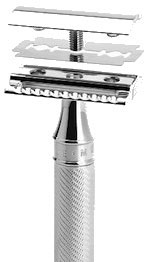
Loading A Three-Piece Razor
 With a three-piece razor, the base and top part of the head are removable. Holding the head with the thumb and forefinger, you can turn the handle or knob to loosen the entire head piece.
While still holding the base with the finger, you should lift the base at an angle. This allows the used blade to slide out. After centering the new blade on the guides and bolt, you should align the top head piece with the base.
You should then hold the assembled head with the curve side down and thread the bolt through the handle. Simple tighten the knob or handle for a secure fit.
[divider]
Resource: http://thecopperhat.ca/
How To Shave With A Safety Razor
So you have your fully assembled razor of choice. Now it is time to start shaving! In addition to your razor, you’ll need to get all of the essentials. This includes shaving cream or soap, some facial scrub, and a towel. With all of your gear ready, you can follow these steps to get a great shave.
1. Study Your Facial Hair
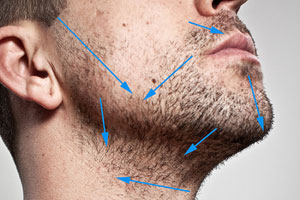 It is important to know how your facial hair grows. To avoid irritation, you should always shave in the direction that your hair grows.
You’ll need to know which direction your hair grows all over your face and the points in which the directions change. This will ensure that you get an irritation-free shave.
[divider]
2. Clean And Exfoliate
 You will need to prepare your face by cleansing it first. You should use both a normal cleanser and an exfoliator.
A scrub contains particles that will remove dead skin and lift your hair. The hair will stand up, allowing you to get an even closer shave.
[divider]
3. Softening Your Hair
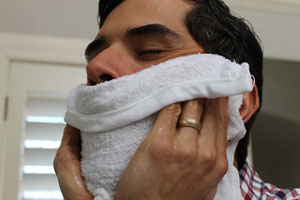 Softening your facial hair will make the shave much more comfortable. It’ll require less effort to shave and help avoid pulling.
It is recommended to take a shower before you shave so that the steam and hot water softens the beard as much as possible.
If you don’t have time for a shower, you can use a towel soaked in hot water. A hot towel applied to the face for 30 seconds will soften your facial hair considerably.
[divider]
4. Applying The Shaving Cream or Soap
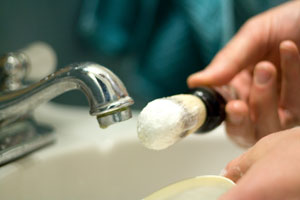 The best way to apply your shaving solution of choice is with a brush. Badger brushes are one of the most effective ways to evenly coat your face and lift the hair.
If you don’t have a brush, you can always use your hands. After application, you should leave the solution on your face for at least 30 seconds before you begin shaving.
[divider]
5. Shaving Your Sideburns And Sides Of Face
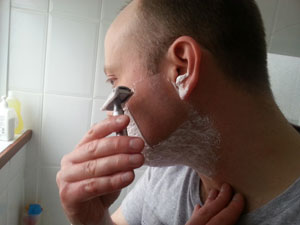 Going in the direction of your hair growth, you should always start at the sides of your face and work your way inwards.
Holding the razor at a 30 degree angle, you should shave in short strokes. To avoid cuts and irritation, don’t add any pressure. The razor should have enough weight to easily glide across your face.
[divider]
6. Shaving The Neck
Special care and consideration should be taken when shaven the neck. Not only is this area sensitive, but hair tends to grow in sporadic directions.
With hair growth direction in mind, carefully shave the neck with short strokes to get a smooth shave.
[divider]
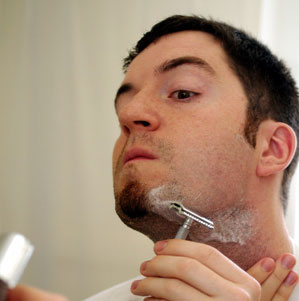
7. Shaving The Lip And Chin
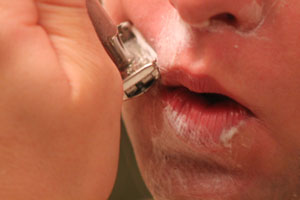 It’s recommended to shave this area last, as it gives the shaving cream or soap a longer period of time to soften the skin. This area is very prone to nicks, as there is more curves.
When shaving, you should use your free hand to stretch out the skin and make it as taut as possible. This will create a flat surface for the razor to glide over.
[divider]
8. Cleaning Up

After you are done shaving, you should clean your face up with a splash of cold water. This will close up the pores and relieve your skin.
Alternatively, you can use a damp towel with shaving tonic.
[divider]
9. Applying After Shave Balm

To soothe your skin, you should always apply an after shave balm. These balms have therapeutic oils and nutrients to reinvigorate your skin, leaving it hydrated and soft.
[divider]
![]()